Rainmail Chat Server allows conference chats. To do conferencing, a room needs to be created. Rooms can be created by any authorized user of the system. Once created, multiple users can join a room. Any user who has joined the room can send a message and any such message is displayed to all users in the room. For additional security, rooms can be password protected. In that case, password is given to select users and only those users who have the password can join the room and take part in the discussion. Detailed instructions to use conferencing is given below:
- Login to Pidgin Chat client. Click on Buddies menu on top. That will bring up the following menu.
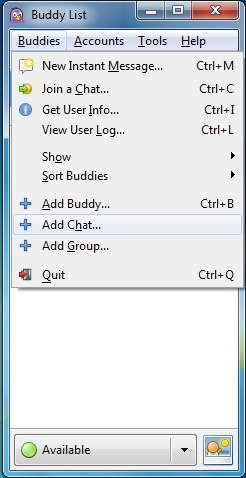
- Select Add Chat... That will bring up the following window.
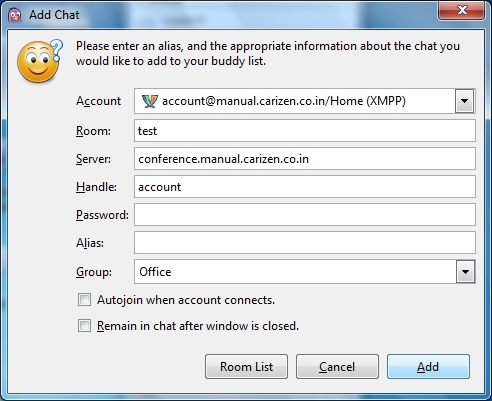
- If a new room is being created, type room-name in Room: field.
- If you need to join an existing room, type the name of the room you wish to join in the Room: field. To get names of existing rooms, click on Room List.
- In the Server: field, type the name of the Server. Server name is usually full host name of Rainmail Server prefixed with "conference.". For example, if Rainmail Server host name is demo.carizen.in, conference server name should be given as conference.demo.carizen.in.
- To password protect the room, enter a password in the Password: field. If password is not given, any user who knows the room name can join the discussion.
- Click on Add.
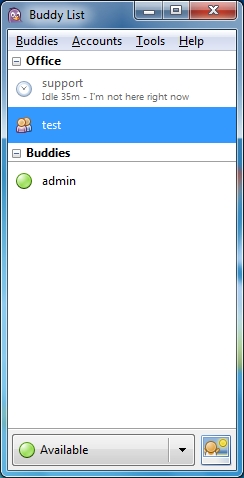
- The room will be successfully added and displayed in the main Chat window (as shown above). To start discussions in the room, double click on the room name. That will bring up the following window.
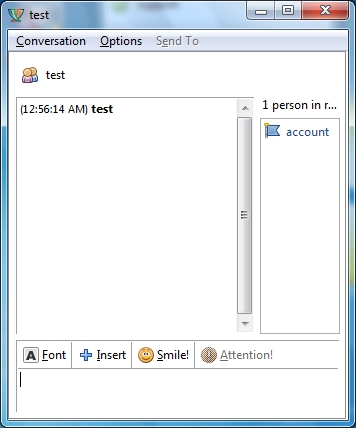
- The Conference window (as shown above) is displayed. The window consists of three panels. The top left panel shows all the messages that have been sent by members of the room. The top right panel shows the list of users who are currently in the Room. The bottom panel allows users to send messages to others.
- Once created, a user can invite other users into the Room and start discussions. To invite other users, click on Conversation menu in the Room window. That will bring up the following menu.
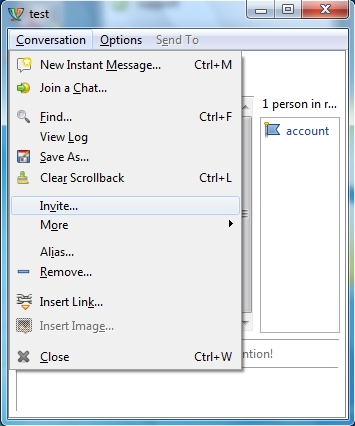
- Click on Invite.... That will bring up the following window.
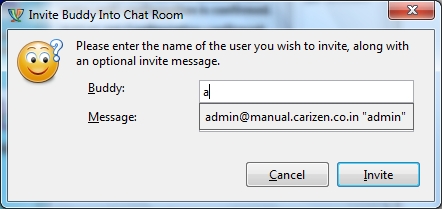
- Enter the chat ID of the user you wish to invite in the Buddy: field. The ID will usually be the Rainmail Account name of user followed by @ and followed by the host name of Rainmail Server (e.g., user@demo.carizen.in).
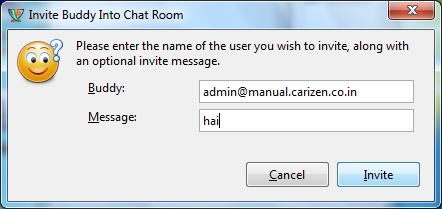
- Enter any message you wish to specify, in the Message: field. This will be displayed to the Invitee when the invitation is sent.
- Click on Invite.
- An invitation message is displayed to the user and once the user accepts, the username appears in the top right hand side panel (as shown below)
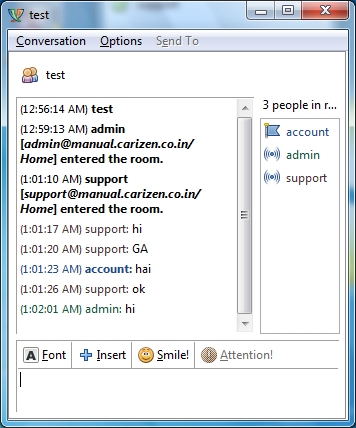
- All users who have joined the room can send messages and these will be sent to all users.


