Rainmail Server provides multiple Graphical User Interface for administration. Those can be accessed as follows:
- Rainmail Administrator Java GUI is a full fledged User Interface to administer all the modules. This can be run as follows:
- Boot Rainmail Server in GUI mode
- Login as root with associated password.
- Go to Start -> System -> Configure Rainmail Server
- That will bring up the following Window:
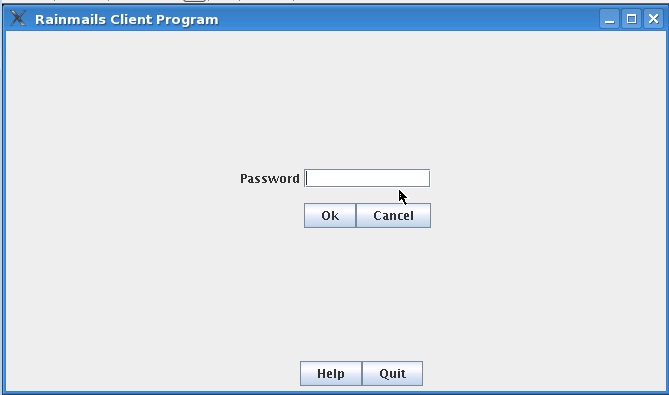
- Enter the default password, which is server.
- Click on OK
- That will bring up the following dialog.

- Click on Administrator under the Activate Profiles section. That will bring up the following
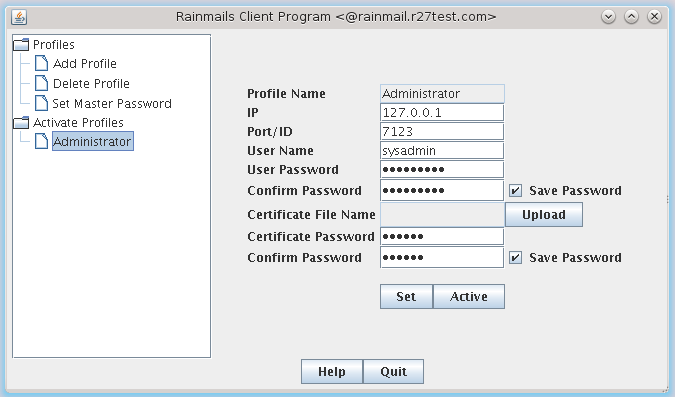
- Click on Active button. That will bring up the password dialog as follows:

- Enter the root password and click on OK.
- That will bring up the GUI as follows:
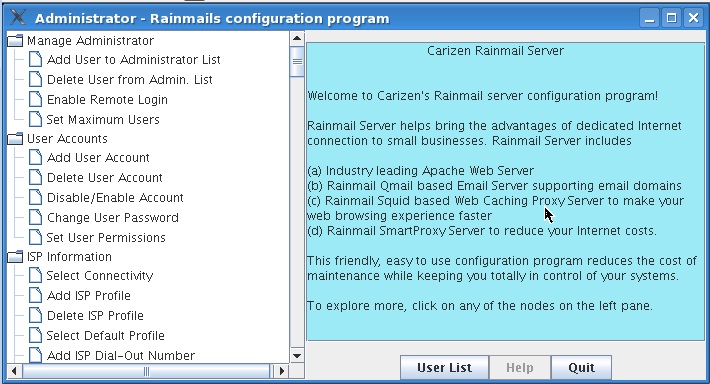
- This can be used to Administer the server and add/delete and modify user accounts.
- Each option has a Help button in it. More details about the command and parameters required can be had by clicking on the Help button.
- Web based Admin GUI Rainmail Server provides a Web based Interface using which an Administrator can perform day to day activities like creation/deletion and modification of users. The interface can be accessed as follows:
- Open up Internet browser from any Desktop in the same Network as Rainmail Server.
- Go to the URL http://<IP of Rainmail Server> (e.g., http://192.168.1.4)
- That will open up a page with following section:
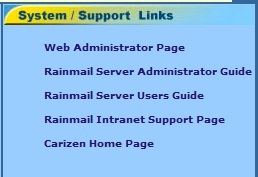
- Click on Web Administrator Page link.
- The page will prompt for a User name/password.
- Enter mailservice as user name.
- Enter password of mailservice user
- That will open the following page
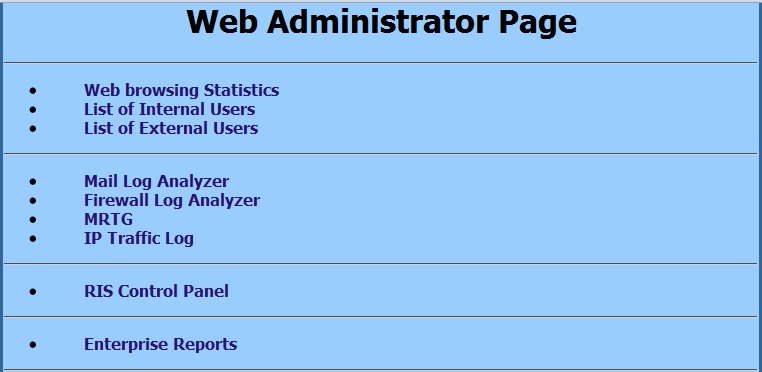
- Click on RIS Control Panel link. That will open the following page
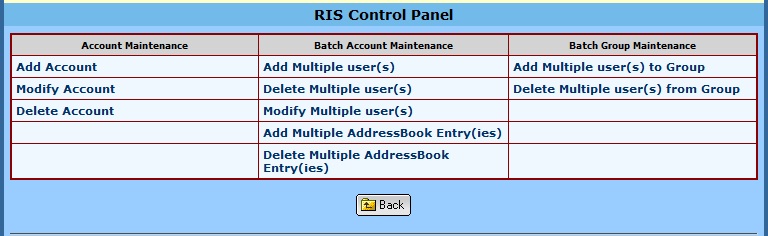
- Click on the links to Administer Rainmail Server.


