Rainmail provides a Calendar to individual users. Sometimes it is required to provide calendar to schedulable resources, e.g., a Conference room. This can be accomplished in Rainmail by creating a new resource. In Rainmail, resources can only be created by Administrator. The instructions for creating a new resources are as follows:
- Login as Administrator.
- Click on Calendar tab. That will bring up the following screen:

- Click on Administration (indicated by Red oval above). That will bring up the following dialog

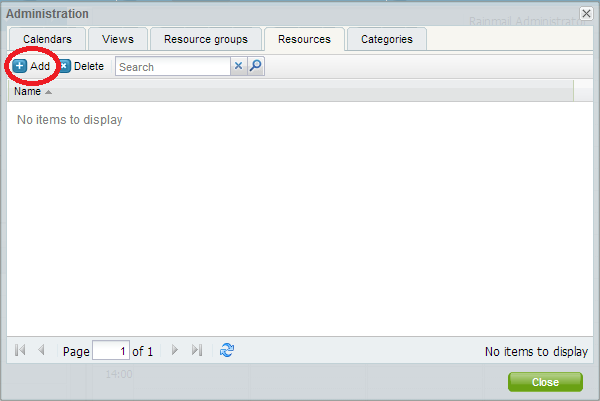
- Click on Resources tab (indicated by Red Oval above). In the dialog that comes up, click on Add button (indicated by Red Oval below).
- That will bring up the following dialog
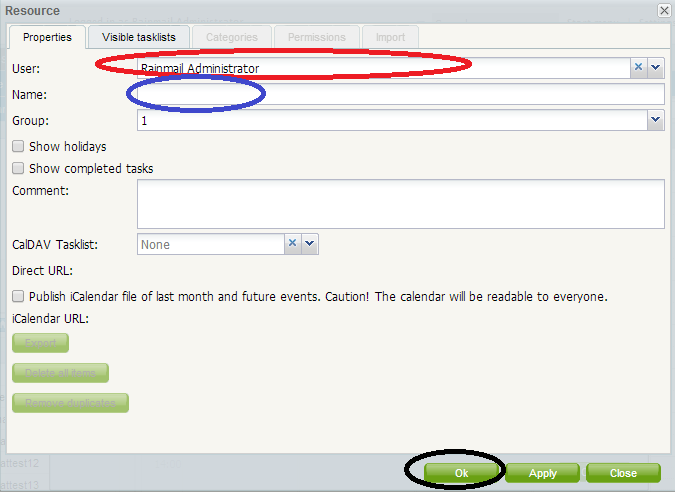
- In the User field (indicated by Red Oval), select the user who will own / manage the resource.
- In the Name field (indicated by Blue Oval), specify name of resource (e.g. Narmada Conference Room).
- Click on OK (indicated by Black Oval).
- This will create the resource
Once the new resource is created, owner should give permission to authorized users to see and schedule the resource. That can be done as follows:
- Login to Rainmail Webmail
- Click on Calendar tab. That will bring up the following screen:
- Click on Administration (indicated by Red Oval above). That will bring up the following dialog
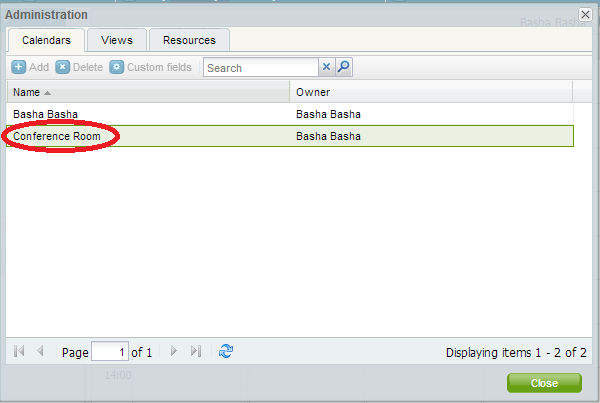
- Double click on the Resource name. That will bring up the following dialog
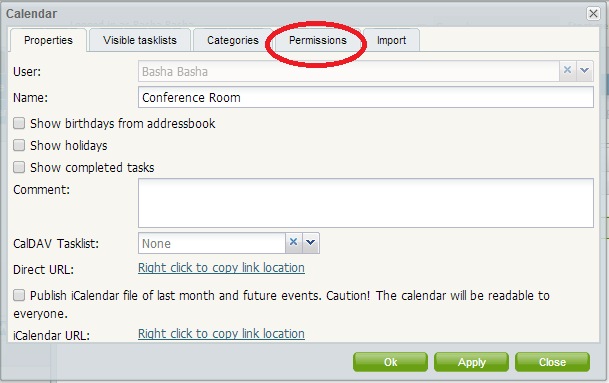
- Click on Permissions tab (indicated by Red Oval). That will bring up the following dialog.
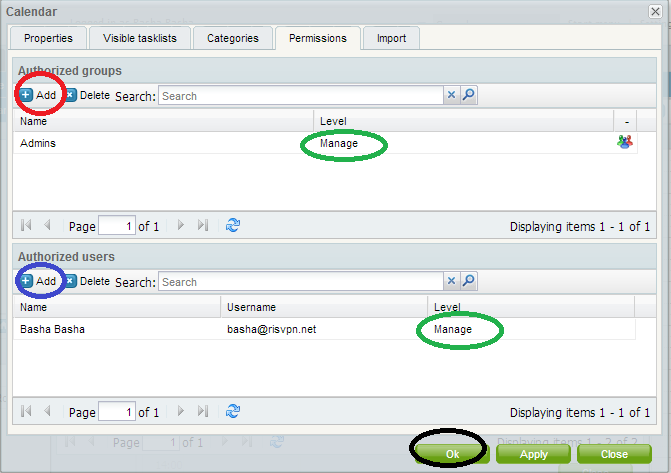
- Permissions for resource access can be given to users by clicking on Add button (indicated by Blue Oval).
- Permissions for resource access can be given to group of users by clicking on Add button (indicated by Red Oval).
- The level of access (Read Only, Write, Write and Delete, etc.) can be given to Users/Groups by clicking on the parameter in the Level fields (indicated by Green Oval).
- Once permissions are given to authorized users, close the dialog by clicking on OK button (indicated by Black Oval).
Once users are given permissions, they can access the Resource in their Calendar application and schedule the resources as required.


