Rainmail Webmail allows users to share access to folders with other users and or groups. Once sharing is activated, the user can modify the level of access provided. The levels are Read only, Read and Create only, Write, Write and Delete, Manage.
The steps to share a folder and modify permissions are listed below:
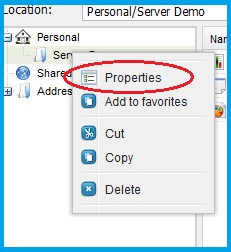
- Right click on the folder that has to be shared
- The following menu pops up. Click on Properties (indicated by the red oval)
- The Properties dialog pops up. Check the check box next to Activate Sharing (indicated by the red oval)
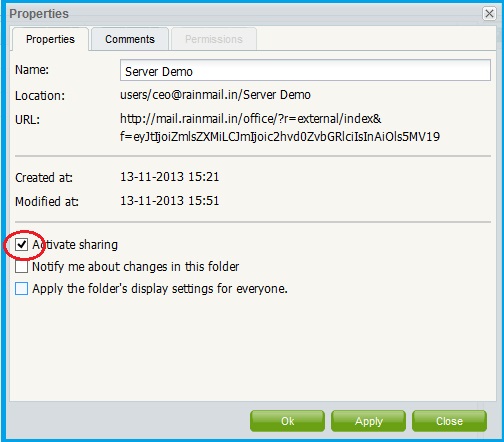
- Click Apply
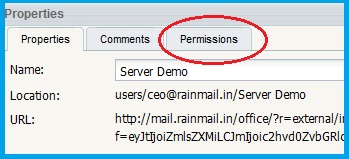
- The Permissions tab gets activated. Click on Permissions (Indicated by the red oval)
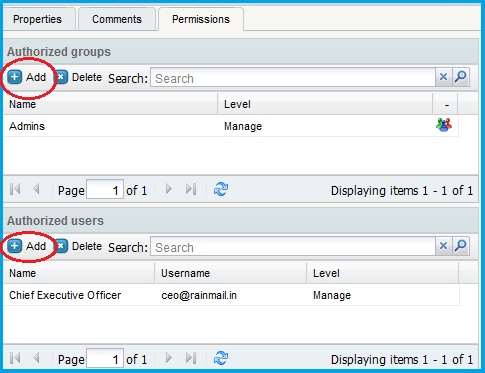
- The list of Authorized users and groups appears.
- To share with a group Click on Add button under Authorized groups
- To share with a user Click on Add button under Authorized users (indicated by the red ovals)
- The following dialog appears. Select the user(s)/group(s) you want to share the folder with
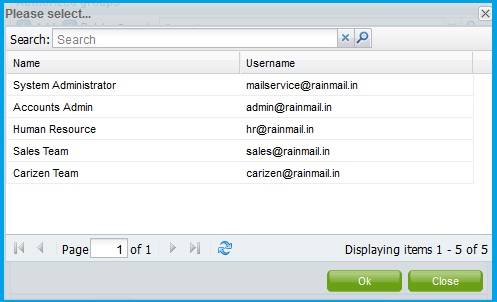
- Click Ok
- The name(s) of the selected user(s)/group(s) is now displayed under Authorized users/groups
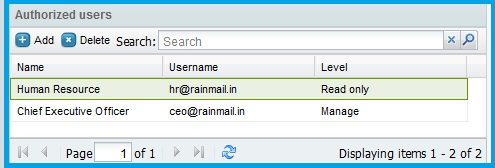
- Rainmail by default provides Read only permission. To change permission level
- Double click on the Level column entry corresponding to the username (indicated by the red oval in this example)

- A drop down menu appears. Select the permission level of your choice
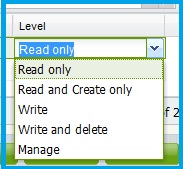
- Click Ok to close the dialog
- You have successfully shared and modified folder permission levels with other user(s) and or group(s)


